Difference between revisions of "The Three Windows"
Jump to navigation
Jump to search
(→Overview Window) |
(→Overview Window) |
||
| Line 14: | Line 14: | ||
===Overview Window=== | ===Overview Window=== | ||
| − | Finally, there is the Overview window. The simple purpose of this window is to help you navigate around large assemblies. The black box within | + | Finally, there is the Overview window. The simple purpose of this window is to help you navigate around large assemblies. The black box within this window represents the visible area of the simulation space. |
[[File:Overview_win_00.png|thumb|center|upright=2.0|alt=Overview Window|Overview Window]] | [[File:Overview_win_00.png|thumb|center|upright=2.0|alt=Overview Window|Overview Window]] | ||
Revision as of 15:10, 17 July 2013
Contents
Introduction
Windows
There are three main windows in the TAS user interface:
Simulation Window
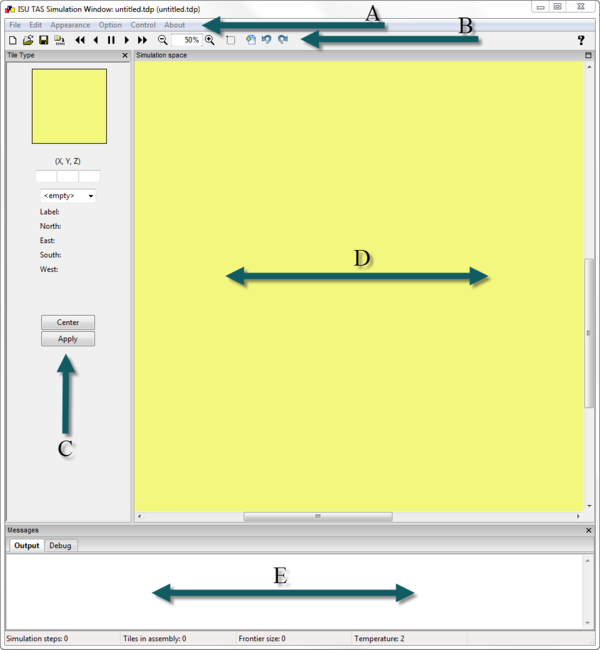
This is the main window of TAS. Within it the user can interface with the drop down menus (A), the toolbar (B), the Tile Type window (C), and the Simulation space (D). There is also a terminal styled Messages box (E) that outputs information about the state of the program.
Tileset Editor Window
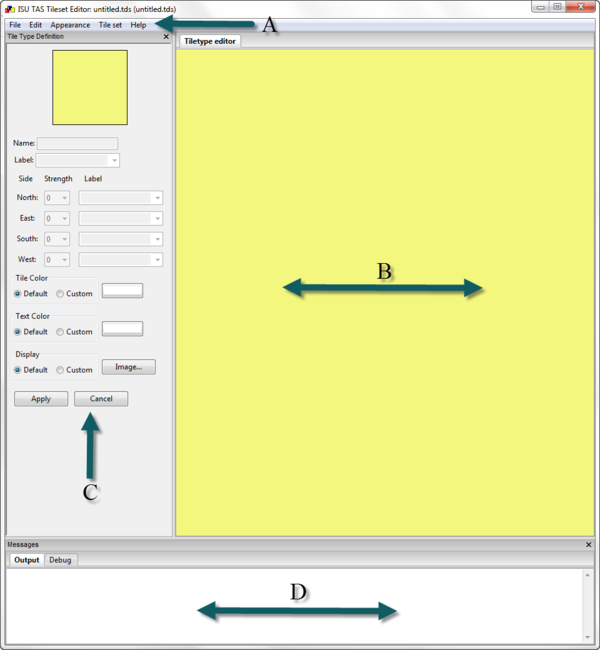
The Tileset Editor window consists of the drop down menus (A), the Tiletype editor (B), the Tile Type Definition (C), and a Messages box (D).
Overview Window
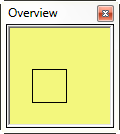
Finally, there is the Overview window. The simple purpose of this window is to help you navigate around large assemblies. The black box within this window represents the visible area of the simulation space.


