Difference between revisions of "2HAM Demonstration"
Jhendricks (talk | contribs) (→Introduction) |
Jhendricks (talk | contribs) (→Introduction) |
||
| Line 2: | Line 2: | ||
[[File:2HAM_Config_window.png|thumb|alt=2HAM Config|Configuration window.]] | [[File:2HAM_Config_window.png|thumb|alt=2HAM Config|Configuration window.]] | ||
==Introduction== | ==Introduction== | ||
| − | The [[Two-Handed Assembly Model (2HAM) | 2HAM]] is meant to model systems where self-assembly of multiple sub-assemblies can occur separately and in parallel, and then those sub-assemblies can combine with each other. In the 2HAM there isn't an initial seed. All of the tiles you create in Tile Editor have equal status and as such they all nucleate in parallel with each increment forward. The prerequisites for binding in the 2HAM are basically the same as they are in the aTAM. Two sub-assemblies can bind in the 2HAM if they have a set of matching edges which can align without overlap and assuming that these matching edges meet or exceed the temperature threshold. | + | The [[Two-Handed Assembly Model (2HAM) | 2HAM]] is meant to model systems where self-assembly of multiple sub-assemblies can occur separately and in parallel, and then those sub-assemblies can combine with each other. In the [[Two-Handed Assembly Model (2HAM) | 2HAM]] there isn't an initial seed. All of the tiles you create in Tile Editor have equal status and as such they all nucleate in parallel with each increment forward. The prerequisites for binding in the [[Two-Handed Assembly Model (2HAM) | 2HAM]] are basically the same as they are in the aTAM. Two sub-assemblies can bind in the [[Two-Handed Assembly Model (2HAM) | 2HAM]] if they have a set of matching edges which can align without overlap and assuming that these matching edges meet or exceed the temperature threshold. |
| − | This tutorial will primarily be concerned with introducing you to the configuration options that are available in TAS for 2HAM simulation. | + | This tutorial will primarily be concerned with introducing you to the configuration options that are available in TAS for [[Two-Handed Assembly Model (2HAM) | 2HAM]] simulation. |
==Working with the 2HAM in TAS== | ==Working with the 2HAM in TAS== | ||
Revision as of 16:12, 12 August 2013
Contents
Introduction
The 2HAM is meant to model systems where self-assembly of multiple sub-assemblies can occur separately and in parallel, and then those sub-assemblies can combine with each other. In the 2HAM there isn't an initial seed. All of the tiles you create in Tile Editor have equal status and as such they all nucleate in parallel with each increment forward. The prerequisites for binding in the 2HAM are basically the same as they are in the aTAM. Two sub-assemblies can bind in the 2HAM if they have a set of matching edges which can align without overlap and assuming that these matching edges meet or exceed the temperature threshold.
This tutorial will primarily be concerned with introducing you to the configuration options that are available in TAS for 2HAM simulation.
Working with the 2HAM in TAS
The 2HAM Configuration Window
There are several tile sets that come with TAS and for this tutorial we will be using one which was explicitly created for the 2HAM, "2HAM_2-bit_counter-full.tdp". To load saved assemblies into TAS from the "samples" folder do File -> Load tile assembly system... -> From TAS base directory navigate to samples folder -> Select Assembly -> Open.
As soon as you load the pre-made tile set you should notice that a 2HAM Configuration window appears on the left side of your screen. Initially under Supertiles there will be 108 tiles of size 1. Press the forward button twice, and your 2HAM Configuration window should look like this:
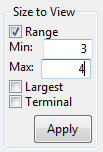
Notice that within just two steps you have created over 400 unique nucleating assemblies. Take a second to navigate around the Simulation space with your Overview window. The largest tiles are always at the top of the Simulation Space, while the smallest, in this case singletons, remain at the bottom of the Simulation Space. With so many separate supertiles in the simulation space it is convenient to be able to zone in on the ones that you are interested in. It is for this reason that within the configuration window it is possible to filter the visible supertiles under the 'Size to View' option.
Size to View Includes these features:
- Range: Upon checking the 'Range' box 'Min' and 'Max' text boxes appear as seen in the picture below. This option gives you precision in filtering the visible space.
- Largest: This option simply makes the largest tiles the only visible tiles.
- Terminal: A terminal supertile is one which can no longer bind with any other supertiles in the simulation space. Applying this option will make only the terminal supertiles visible.
Another option embedded in the 2HAM configuration window is the ability to choose which supertiles you wish to keep for future iterations. For example if you select Largest -> Apply, the only tiles remaining in the simulation space, and thus the only tiles which can combine with each other to form new supertiles, will be the largest current supertiles. You may also select a Range to keep; any supertiles outside of this range will be permanently discarded.
2HAM Features in the Tile Type window
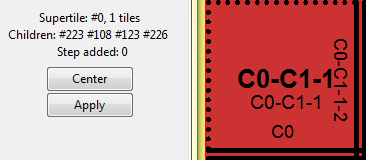
Navigate to the bottom left corner of the Simulation Space and click on the tile C0-C1-1.
In the Tile Type window three lines will appear above the Center and Apply buttons:
- Supertile: This line indicates the number of the supertile, in this case '#0', as well as the number of tiles in the supertile assembly.
- Children: The children of a supertile are the supertiles that incorporate this parent into their assemblies.
- Step added: The step that the supertile was added. Note also that the counting starts at 0.


